Free Software Download Center
Software for industrial data collection, monitoring, and analysis.
SCADA COMMAND SECURITY • OPERATOR VERIFICATION • CONTROLLED COMMAND EXECUTION
In EOS SCADA, adding a verification mechanism to user controls that send commands to controllers can help ensure that critical operations performed by the operator are carried out in a more controlled and deliberate manner.
The verification mechanism used with command-sending controls such as circuit breakers, disconnectors, buttons, and similar controls is an important control layer that helps prevent commands from being sent accidentally.

SCADA systems are software systems that allow operators to monitor industrial processes and intervene in the process when necessary. These interventions are generally performed through user controls such as buttons, input boxes, selection boxes, sliders, breakers, and similar controls.
An incorrect command sent by an operator or an incorrect value transferred to the controller may lead to undesirable consequences in terms of process safety, system stability, and data integrity. Therefore, for critical operations, it is important to verify that the command is intentionally sent by the operator.
Adding a verification mechanism to user controls provides an important security and quality-control layer that can be applied before a command is sent in a SCADA application.
To add verification to command-sending user controls in the EOS SCADA Editor, the relevant project must first be loaded into the Editor software.
Then, open the SCADA screen containing the user control to which verification will be added and select the relevant user control.
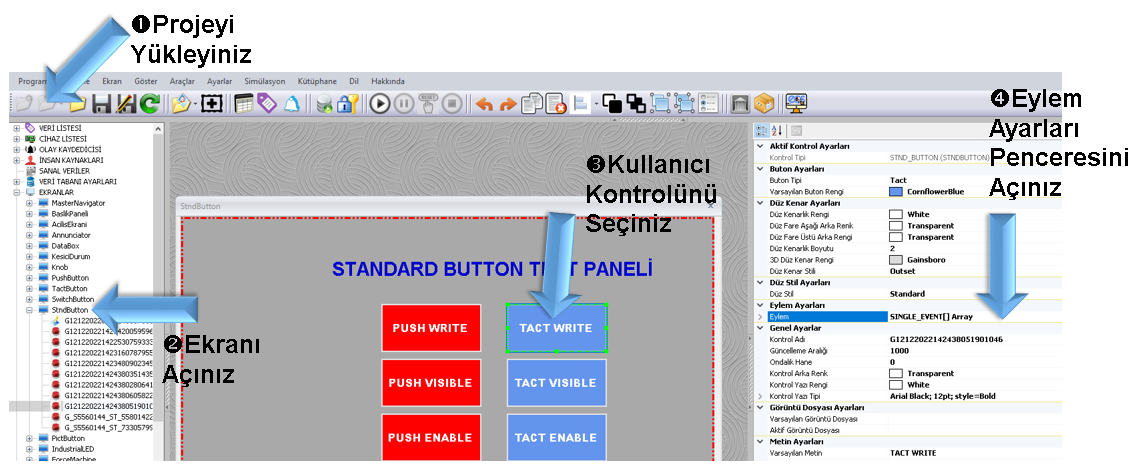
Verification should only be added to the first Write action that sends the command.
A user control may contain multiple actions. Therefore, the actions should be reviewed from top to bottom, and verification should be configured on the first action whose Operation value is Write.
After identifying the first action whose Operation value is Write, configure the following verification settings.
| Setting | Required Action |
|---|---|
| Request Verification | Set to True. This causes the user to be prompted for verification before the relevant Write action is executed. |
| Verification Level |
Determines how many times verification is requested from the user. The verification process is
performed the specified number of times.
For example, if the verification level is 1, verification is requested once and the command is sent when verification is successful. |
| Verification Message |
The message displayed to the user during verification. It should be used to clearly and
understandably inform the user about the nature of the operation to be performed.
If this field is left blank, the standard verification prompt is displayed to the user. |
After completing the settings, click the Save button to store the relevant settings.
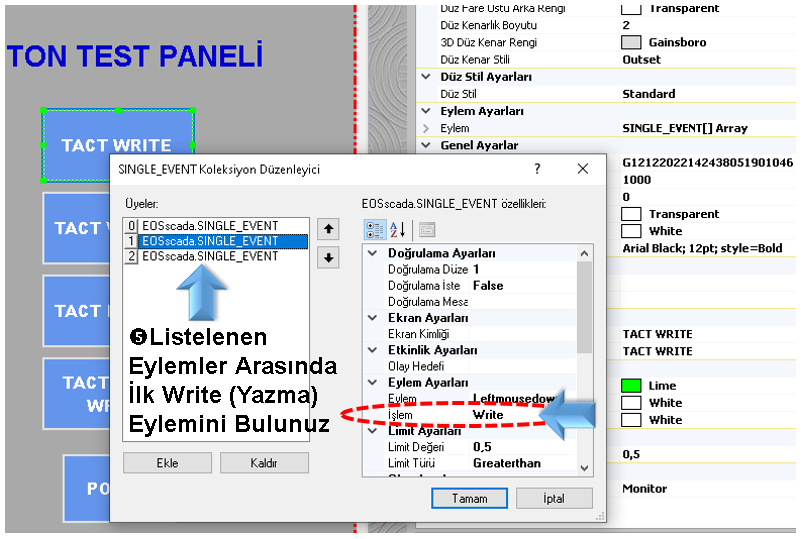
Finally, save the project to complete the operation.
The verification message can be used to clearly remind the operator of the operation they are about to perform. Especially for critical commands, explaining the operation to be performed instead of displaying only a generic question can help the operator consciously evaluate the command.
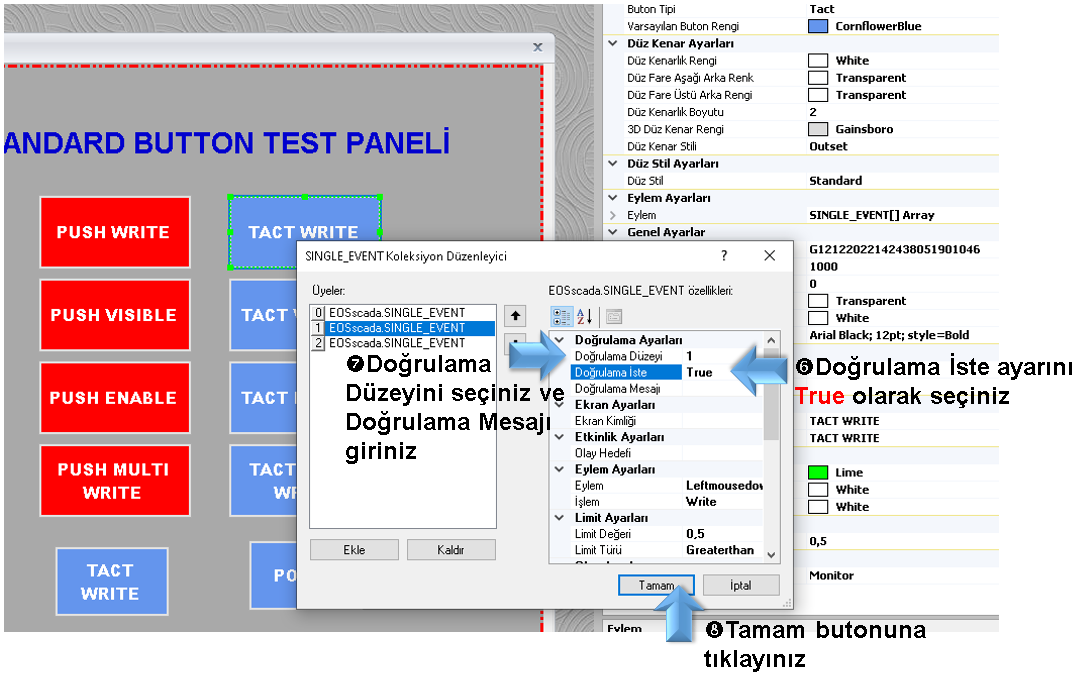
This approach allows the verification mechanism to be used not only as a blocking dialog, but also as a user awareness mechanism that reminds the operator of the operation about to be performed.
Configuring verification settings in BREAKER user controls differs slightly from other command-sending user controls.
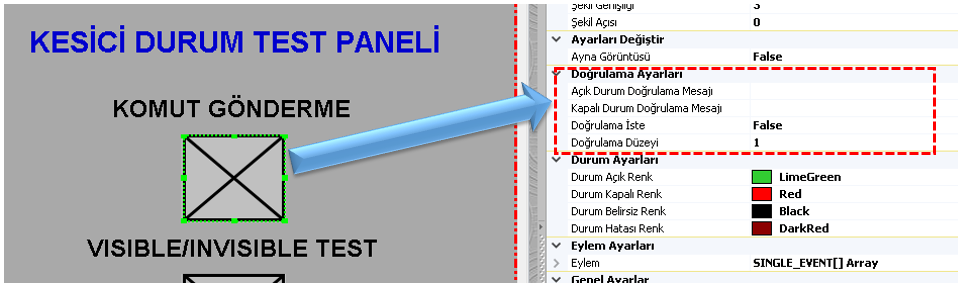
In the BREAKER user control, the verification settings are displayed directly in the user control's settings table. Therefore, verification settings must be configured through the settings of the relevant user control, rather than through the Action window.
Separate verification messages can be defined for the Open and Closed states of the BREAKER control.
Open and Closed commands should be treated as independent operations, and the required verification messages should be defined separately for both states.
The verification mechanism applies only to command-sending user controls.
For example:
This verification mechanism is not applicable to user controls used solely for display purposes that do not send any commands to the controller.
A command-sending user control may contain multiple actions. In this case, the verification setting must be added to the first action whose Operation value is Write.
Adding verification to multiple Write actions may cause the user to be asked for verification more times than necessary.
Therefore, the actions should be reviewed from top to bottom, and verification should be configured only on the first Write action.
Free Software Download Center
Software for industrial data collection, monitoring, and analysis.

Technical Support
Software documentation, sample code, and practical technical information.
You can contact us regarding EOS software, technical documentation, or industrial data communication.